Microsoft (OneDrive and OneNote)
Overview
- OneNote is a Microsoft Office application that is principally concerned with note organisation and management.
- OneDrive is a cloud storage service provided by Microsoft.
Bottle Rocket can integrate with a given Microsoft account to allow workflows to put files into OneDrive or OneNote.
note
There are two ways to add a Microsoft connector to Bottle Rocket:
- Pre-registered application: Bottle Rocket has a pre-registered app that can be added to your Bottle Rocket account. You do not need to set up an Azure Entra App registration and can simply add the connector by entering the device code when prompted.
- Custom application: If you want greater control over the app registration, you can simply create your own in Azure Entra and provide the Client and Tenand IDs in the connector configuration.
Prerequisites
- In order to create a Microsoft connector, you will first need to sign up for a Microsoft account, if you don't already have one.
Option 1 – Adding the "pre-registered" Bottle Rocket connector
You can add the pre-registered Bottle Rocket connector as follows:
- Login to your Bottle Rocket server.
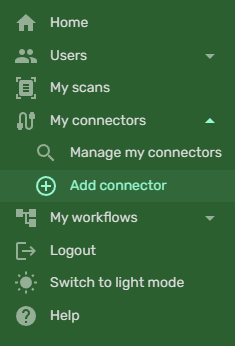
- On the left-hand sidebar, under My connectors, select Add connector.
- Select the Microsoft App Connector (Bottle-Rocket) from the list of connectors, and click the Add connector button.
- You can skip straight to the complete authorization step.
Option 2 – Adding a custom Microsoft application
Create the Entra app registration
- Login to the Microsoft Entra admin portal.
- Alternatively, you can login to the Microsoft Azure portal and navigate to the Microsoft Entra ID blade.
- In the top menu, select + Add > App registration.

- Give the app a name.
- Under Supported account types, you can specify a level of access you require for the app. In most cases, where you will want to upload your personal notes to your personal OneDrive, for example, you can set this to Personal Microsoft accounts only.
- Redirect URI can be left blank.
- Click the Register button to create the app.

Configure the app flow
- In the left-hand sidebar for the app registration, under Manage, select Authentication.

- Under Settings, set Allow public client flows to Enabled.
Configure the API permissions
- In the left-hand sidebar for the app registration, under Manage, select API permissions.

note
Under the section What type of permissions does your application require?, ensure you have selected Delegated permissions.
OneNote
- Click + Add a permission.
- Under Microsoft APIs, scroll down and select OneNote.

- Check the following permission:
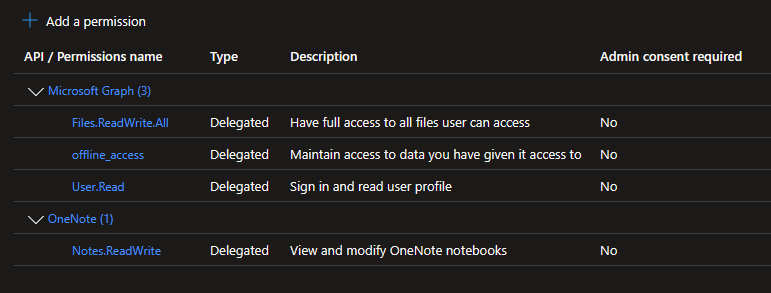
Notes.ReadWrite.All
- Click Add permissions.
OneDrive and offline_access
- Click + Add a permission.
- Under Microsoft APIs, click on the top Microsoft Graph item.

- Check the following permission:
offline_access
- Scroll down to the Files group, and check the following permission:
Files.ReadWrite.All
- Click Add permissions.
Confirm permissions and application
- Your permissions should now look something like this:
- In the left-hand sidebar for the app registration, select Overview.
- You will see the key properties for your app registration, of note:
- The Application (client) ID.
- The Directory (tenant) ID.
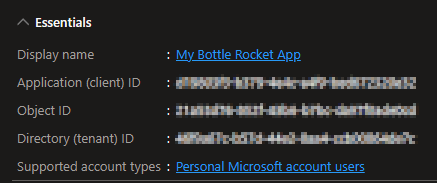
- These values will be supplied in the Bottle Rocket connector page.
Add the (custom) Microsoft connector to Bottle Rocket
- Login to your Bottle Rocket server.
- On the left-hand sidebar, under My connectors, select Add connector.
- Select the Microsoft App Connector (Custom) from the list of connectors, and click the Add connector button.
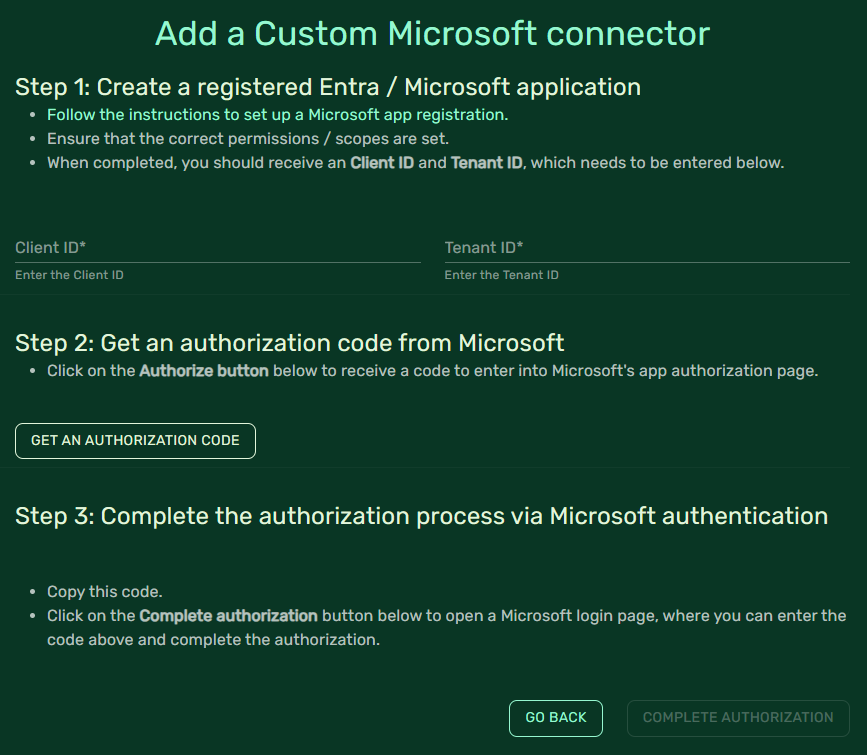
- Enter the client and tenant ID values you obtained from the app registration in the previous steps.
Complete the authorization
- Click Get an Authorization Code. If successful, a code should appear in the window.
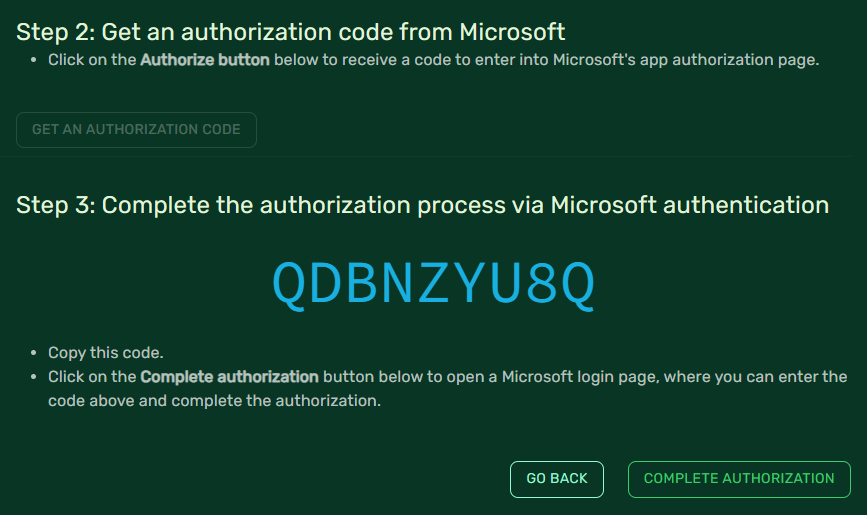
- Copy the code to the clipboard.
- Click on the Complete Authorization button to open the verification URL.
- Enter / paste the code you copied from the Bottle Rocket page.
- Select the (Microsoft) account you wish to authenticate with, as part of this connector.
- You will be prompted to confirm that the code you entered matches the code supplied; click Continue.
- Complete the authentication process (password, passkey, one-time code, etc.) as prompted.
- You will be prompted to Deny or Accept the permissions requested by the app.
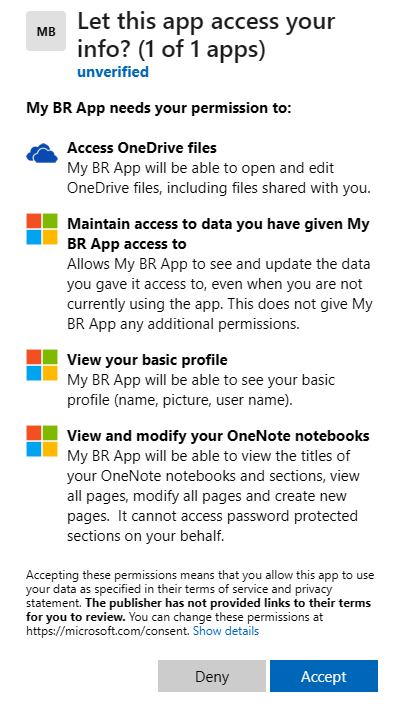
- If you are comfortable with this request, click Accept.
- The authentication should complete, and you can close this browser tab.
- After an interval, the connector should be displayed in the list of connectors with a green indicator.

You now have a working Microsoft connector that can be used with OneNote and OneDrive workflows.